Monday, December 30, 2013

Kid's crafts

I haven't posted in a while because I've been busy with the holidays and the kid's camps that I've been holding during winter break. I thought I'd share some of the neat projects that my crafters signed up for during their break from school.
Let it Snow Sign:


Snowman Ornament:


Snowman Centerpiece:


Snowflakes:


Winter Snow Globe:


It's been so much fun holding these camps and seeing how my clever  crafting gurus come up with their own take on my craft. For a complete listing of my events--both adult and kids visit my website or my Facebook page.

Remember to stamp a little love! 

Thursday, December 5, 2013

It's in the bag!

I am fortunate enough to be going back to a girl scout troop meeting to help some lovely young ladies earn their book making badge! The last time we met, we created a book out of a CD case. Well, book two will be completed tomorrow night at their meeting, and I love how it turned out!


It's my first time actually attempting a lunch bag brag book, and I am sure I'll be making more! There are 2 "secret" compartments, which are perfect for journaling tags or just a little surprise. Here is a close up of my two compartments. One is a tag to journal special memories of the pictures you will be putting in the book and one is a clear envelope filled with fake snow. The second one is just a special surprise but you could easily journal on the envelope with a permanent marker.


I hope these girls enjoy earning their badge as much I as enjoyed making this album.

Remember to stamp a little love!

Wednesday, November 27, 2013

Banner Simply Created Kit

I always love decking my house out for the holidays, especially with handmade items! Well, Stampin' Up has made it super easy for us this year to do just that with their Banner simply Created Kit (item #133507), and accessory kit (item # 132697).

The kit includes 18 canvas pennants, jute twine, alphabet and image stencils, and stampin' spritzer. The only other thing you will need to create countless banners is our reinkers (I used real red and old olive for mine). Super easy to  put together and the creations are endless! Best part is you can reorder just the pennants and jute if you want to make more (item #132699).

The pennants are spritz with an alcohol and reinker combination--depending on your color is how many drops of reinker you use (I used 6-7 drops on mine). You mix it up in the stampin' spritzer, and use the stencils for the backgrounds.


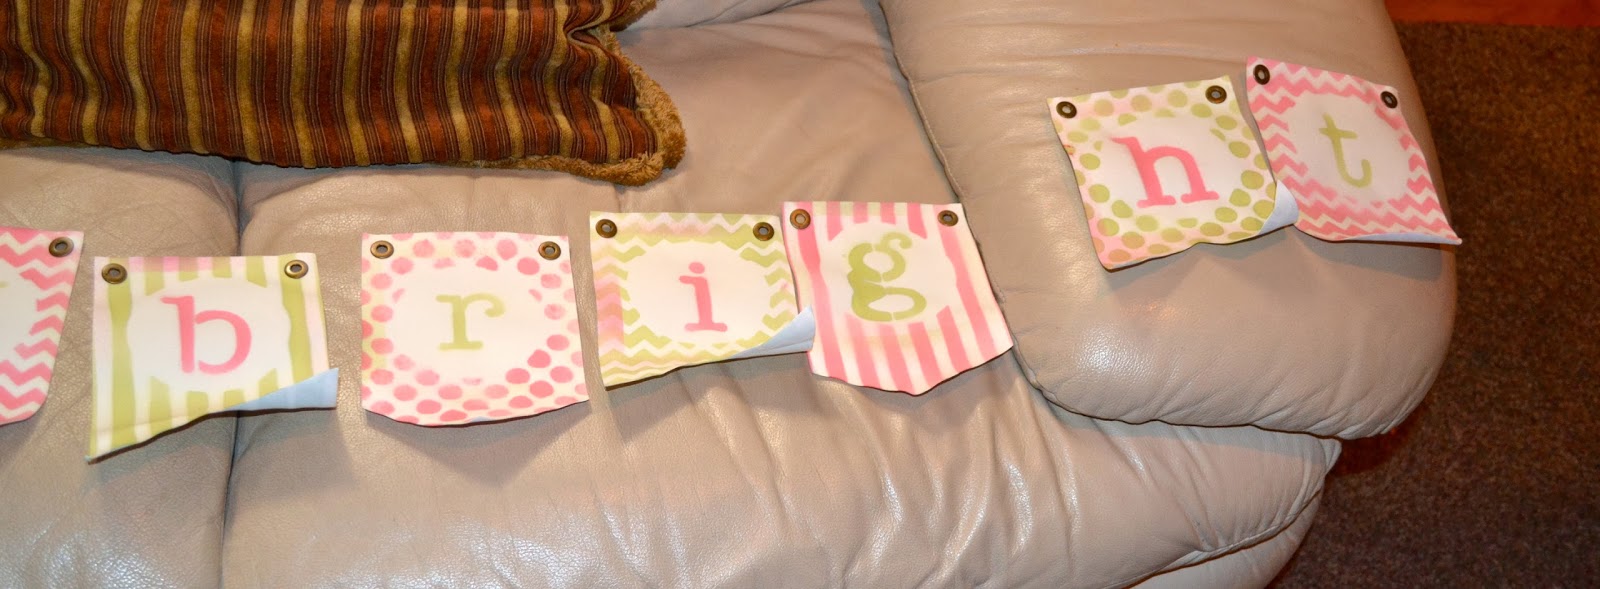
After you've spritzed all the backgrounds, and they have been given time to dry, I stenciled the letters to spell out "merry" and "bright".


Here is what it looks at when all the stenciling is done, and laid out.


After that I strung it on the jute from the kit as well as added some extras from the accessory kit.


The added elements in between each pennants uses the buttons from the accessories and then I used paper in crumb cake, old olive, and glimmer paper behind the button.


 Here is the finished product hung up on the mantel:


I still have more pennants left to create another banner….maybe for Valentine Day!

Remember to stamp a little love!

Sunday, November 24, 2013

Glitter Card Holders

So, who doesn't get tons of holiday cards? I know I do, and I am always trying to find a way to display them that doesn't take up tons of space. This year, I updated my clothespin wreaths with a bit of glitter!


It's the perfect way to display all those cards. Each wreath is made from 24 clothespin, and decorated with embossed paper (using the Big Shot of course) and glimmer paper. Even the banner in the middle adds sparkle.


Remember to stamp a little love this holiday season!

Monday, November 18, 2013

Mini coffe cups

So, I've been seeing these adorable altered mini coffee cups all over the place. Today, I gave them a try, and I absolutely love them! They are the perfect gift that won't break the bank but still let people know you are thinking of them.

Here are the two I came up with this morning.


 Aren't they adorable? I filled them with hershey kisses--who doesn't like chocolate? Here is a close up of each of the cups.


I used the designer series paper in the holiday mini called Seasons of Style (item #132340) to line the outside of the cups, and the greeting from Tags 4 You (item #131823). The finishing touch is the 1/8" taffeta ribbon in old olive from the annual Stampin' Up catalog (item #119525), and a couple of rhinestones (item # 119246) for the center of the "o" in holly and jolly.

Remember to stamp a little love--especially this holiday season!

Tuesday, November 12, 2013

Gift card holder

I am lucky enough to be part of a very talented group of demonstrators that meets every month to create cards or other items. This month's theme was cards with a "surprise" inside. This was one of the cards that my fellow demonstrator Dawn came up with. Its very similar to mine (I posted it earlier) but she took it another step and added an insert to hold a gift card.

Here is what the inside of the card looks like:

Wouldn't this be super cute to present a Starbuck's or Dunkin Donut's gift card to someone with? This card uses the images from the stamp set Perfect Blend (item # 122892)--love this set! You could easily make this a birthday card by changing the colors and the outside sentiment.

Remember to stamp a little love!

Thursday, November 7, 2013

A card with a surprise inside

What could be better than a handmade card for a special someone's birthday? How about one with a surprise inside! This card will be one of the cards we make at my fancy folds class taking place on Sunday, November 17th…check out my website for all the details!


So, it looks like a cute birthday card right? The pennant is made with the petite pennants builder punch (item #122361), and the sentiment is from itty bitty banners (item #126257) and die cut with the coordinating dies, bitty banners (item # 129267). Cute right? Well, it gets even better when you open it up!


Its like a secret little something for the birthday person! What a way to make someone feel special on their "day".

Remember to stamp a little love!

Wednesday, October 30, 2013

Make a cake birthday!


This card uses the Stampin' Up in colors…love all of them! The cake image is from the stamp set Make a Cake--one of my favorites.  I added embossing to each of the strips, it adds the perfect amount of detail to this card.

Remember to stamp a little love!

Friday, October 25, 2013

more & more birthdays!


Yet another birthday card I created for a customer's birthday stash! There are 2 stamps sets that were used--A round array and sincere salutations (retired). I love the color combination…reminds me of warmer weather!

Remember to stamp a little love!

Tuesday, October 22, 2013

And that's not all...BIRTHDAYS!

I'm always looking for a "manly" card for birthdays and I think this creation could be used for guys and gals.


Its a lot of dots (both designer series paper and punches)! I finished off the card with one of the sentiments for Label Love. It's the perfect card for that special guy or gal.

Remember to stamp a little love!

Monday, October 21, 2013

More birthday fun!

Here is another birthday card I created for a customer's birthday stash!


It uses Coastal Cabana as its base with whisper white card stock that is embossed with the perfect polka dots (item #117335) embossing folder. I then used the petite pennants builder punch (item #122361) in the pistachio pudding, coastal cabana, and crisp cantaloupe (all new in colors). The sentiment is from the create a cupcake (item # 121982) stamp set.

Thanks for stopping by and remember to stamp a little love!

Friday, October 18, 2013

More Birthdays!

So, when you have to come up with 30 birthday cards, you want them to be super cute but not take a ton of time. Well, this card does just that! It makes me think of warmer weather which seems to have left us, here is Chicago!


I embossed the whisper white card stock with the modern mosaic embossing folder (item #129984) and die cut one of the flowers from the floral frame collection (item #127012), added the sentiment in the flower from the A Round Array (item #129090) and voila--birthday card complete!

Remember to stamp a little love!

Wednesday, October 16, 2013

Birthday 101 continued

The suspense is over. Here is another one of the cards I created for my customer's birthday card stash!


Super elegant and easy! I used the retired elegant lines embossing folder--love it and can't part with it--along with the elegant butterfly punch (item #127526), and Label Love (item #130622) stamp set. 

This card uses one of the new in-colors, Crisp Cantaloupe, along with the coordinating 3/8" ruffle stretch trim (item #130021). The finishing touch was adding the pearls (item #119247) to the butterfly.  

Remember to stamp a little love!

Monday, October 14, 2013

Birthdays 101

Recently, I was hired by a local women's club to create birthday cards for their members. Needless to say, I've been a busy little bee trying to come up with some really cute cards. Here is just one of the 8 cards that I came up with for the Caring Women's Connection---wonderful local charity that gives back to women's shelters and other deserving organizations.


It's a simple card that uses the elegant butterfly punch from the Stampin' Up catalog (item # 127526) along with a greeting from Bring on the Cake (item #121958).  I really love the elegant butterfly punch (stay tuned for more cards using this punch later this week). Here is a close up of the butterfly punch:


I added a pearl basic jewel (item #119427), and voila, birthday card number one is done! Check back for my other birthday cards in the coming weeks!

Remember to stamp a little love!

Tuesday, October 8, 2013

Nugget Tins

The holidays will be here before we know it, and if you are like me, your list of recipients is long! With 2 school age kids, the task of remembering all the teachers, aides, secretaries etc can be very long (and expensive).

Every year, I create a little something for every specials teacher my kids have (PE, Music, Art etc), and this year is no different. Often times, its the little handmade gifts that make a lasting impression. This year, everyone will be getting a tin full of chocolate--what could be better!


I used the designer series paper out of the holiday mini--Season of Style (item #132340). Each of the 12 chocolate nuggets are wrapped with this paper.


 I then finished the box off by wrapping it with the burlap ribbon, also in the holiday mini (item # 132140), and added a tag using the Deco Label Collection Die cuts (item #130102). 

They were super quick to make, and I won't break the bank remembering all my kid's teachers this holiday season.

Thanks for stopping by, and remember to stamp a little love!

Thursday, September 26, 2013

Warmth & Wonder

Have you seen the Stampin' Up holiday mini? If you haven't, contact me today for a copy! There are so many adorable sets, papers, and embellishments.

One of the sets is warmth & wonder (item #131883)--don't be surprised if you see me using this for my Christmas cards this year. This card uses this set as well as the sweater weather designer series paper (item # 132184) and burlap ribbon (item # 132140) from the holiday mini.
The finishing touch was adding a rhinestone to the top of the tree and to the snowflake from the embossing folder northern flurry (item # 120902).

Thanks for stopping by and remember to stamp a little love!

Monday, September 23, 2013

Fall is here!

Although, I'm a total summer person, I love decorating for fall! I created this sign for an upcoming event I will be at in early October. I've been asked to have some lovely ladies create this sign, and I can't wait to see some of their creations.

I started with some 4 x 4 coasters (I bought mine plain but you could easily "swipe" some for one of your local dining establishments), and some 4 x 4 designer series squares (with their corners rounded). For this sign, I used one of the papers found in the holiday mini-- sweater weather designer paper (item #132184).

I adhered the designer series paper with mod podge--make sure you get the corners so the paper doesn't "roll up". I also used my cropadile to make holes in through the coasters.
I used some ribbon that was super shimmery with a brownish, gold tone--sorry its non Stampin' Up (which is a rarity) to tie the whole project together. As well as a piece of burlap ribbon, which can be found in the holiday mini (item #132140).
Then, my favorite part--embellishing! I used the Autumn accents bigz die (item# 127812),  my alphabet die,  neutral designer buttons (item# 130031), and calypso coral baker's twine (item# 125573)--all from the Stampin' Up annual catalog.


Thanks for stopping by and remember to stamp a little love!